The “It Should Just Work” Myth
You bought that Intel N100 mini PC for a reason. You heard QuickSync is magic—capable of juggling five 4K streams while sipping less power than a lightbulb. So, you spin up a Docker container, hit play on an HDR movie, and… buffering. Your CPU fans scream like a jet engine (I can almost smell the hot plastic from here), and your dashboard shows the CPU pinned at 100%.
We get it. It’s frustrating when hardware specs don’t translate to real-world performance.
The problem isn’t the hardware. It’s the layers of abstraction between your Docker container and that beautiful silicon. Most guides gloss over the nitty-gritty of kernel drivers and user namespaces. In this guide, we’ll fix the “Permissions Hell,” load the missing firmware your N100 is begging for, and give you a copy-paste YAML that actually works.
⚠️ CRITICAL STABILITY WARNING:
- Boot Risk: Modifying kernel parameters (`i915.conf`) and updating `initramfs` involves touching the boot process. If done incorrectly, you may face a “Black Screen”. Ensure you have SSH access or a backup kernel entry.
- RAM Hazard (OOM): This guide uses
tmpfsto transcode in RAM. If your N100 has only 8GB RAM, allocating 4GB to docker creates a high risk of System Freeze/Crash during multitasking. Lower the size to2048mif you are low on memory. - No Liability: The author is not responsible for boot failures or system instability. Proceed with caution.
Phase 1: The Host-First Reality Check
Before we even touch a Docker file, we have to talk about your host OS. Docker is not a virtual machine; it shares the host’s kernel. If your host doesn’t know how to talk to the GPU, your container doesn’t stand a chance.
1. Verify the Device Nodes
First, verify that your Linux kernel actually sees the graphics card. Open your terminal and run:
ls -l /dev/driAnswer Target: You are looking for renderD128. This is the specific device node used for “headless” (monitor-less) transcoding. If you only see card0, you might be missing drivers, but renderD128 is the golden ticket for Jellyfin.
2. The N100 / Alder Lake-N Firmware Trap
Here is where 90% of new builds fail. If you are running an Intel N100, N95, or any modern “E-core only” processor, standard drivers are often not enough. These chips rely on specific firmware (GuC and HuC) for Low-Power Encoding.
According to Intel’s Open Source Graphics documentation, the GuC (Graphics Microcontroller) handles workload scheduling while the HuC (HEVC/H.265 Microcontroller) is mandatory for offloading bitrate control to the hardware. Without explicitly enabling this in the kernel, Jellyfin will silently fail to offload the transcode and fallback to software.
Check your firmware status:
sudo dmesg | grep i915If you don’t see “HuC submission enabled,” you need to force it. I learned this the hard way after debugging a stuttering stream for three days.
The Fix: Add the enable_guc flag to your kernel parameters.
- Create or edit the configuration file:
sudo nano /etc/modprobe.d/i915.conf - Paste this line inside:
options i915 enable_guc=2 - Update your initramfs (commands vary by distro, usually
sudo update-initramfs -u) and reboot.
Phase 2: Solving “Permissions Hell” (Namespace Isolation)
This is the most technical part, but stick with me. Linux permissions are based on numbers, not names. This complexity is not unique to your setup; the 2023 CNCF Annual Survey cites “Storage and Networking” (which includes device mapping) as consistently top challenges for container adoption.
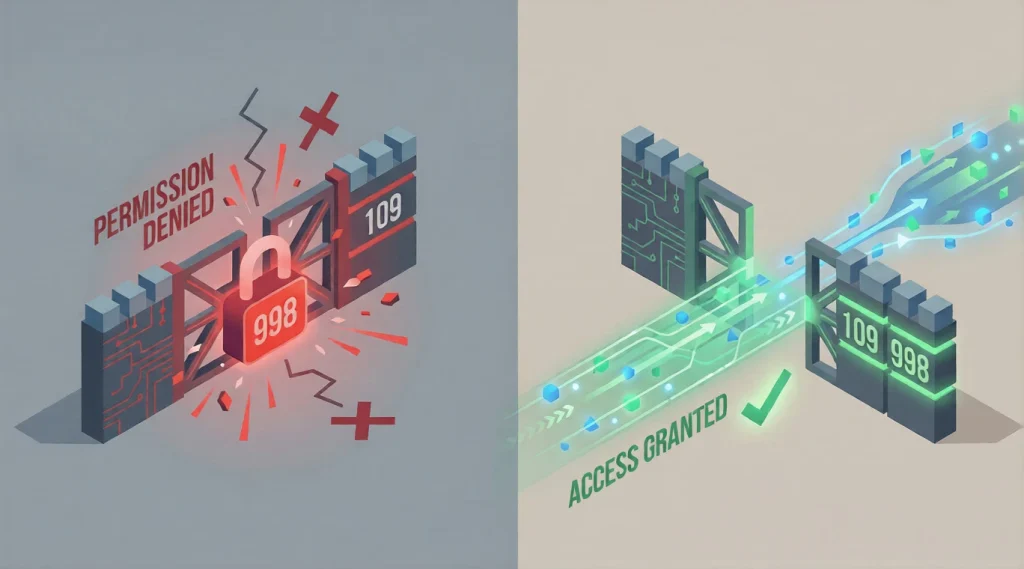
On your host, the render group might have an ID of 109. Inside the Docker container, the OS creates its own groups, and its render group might be ID 998. When you pass the device through, Docker tries to match them up, but often fails. The container tries to talk to the GPU using ID 998, the kernel checks ID 109, and slams the door shut. Result: Permission Denied.
The Solution: Numeric Injection.
Don’t rely on group names. Find the exact numeric ID on your host:
getent group render | cut -d: -f3Write that number down. We will forcefully inject it into the Docker container in the next step. For this guide, let’s assume your number is 109.
Phase 3: The Complete Docker Compose YML
Forget the generic configs you see on Reddit. This configuration is built for LinuxServer.io images (which are superior for home use due to their DOCKER_MODS system) and includes the specific fixes for OpenCL and permissions.
Copy this into your docker-compose.yml:
services:
  jellyfin:
    image: lscr.io/linuxserver/jellyfin:latest
    container_name: jellyfin
    environment:
      - PUID=1000  # Your Host User ID
      - PGID=1000  # Your Host Group ID
      - TZ=America/New_York
      # THE SECRET WEAPON: Injects OpenCL drivers for HDR Tone Mapping
      - DOCKER_MODS=linuxserver/mods:jellyfin-opencl-intel
    volumes:
      - /path/to/library:/config
      - /path/to/media:/data
      # PERFORMANCE HACK: Transcode to RAM to save your SSD
      - type: tmpfs
        target: /transcode
        tmpfs:
          size: 4096m
    devices:
      - /dev/dri:/dev/dri # Maps all GPU nodes
    group_add:
      - "109" # REPLACE THIS with the number you found in Phase 2
    ports:
      - 8096:8096
    restart: unless-stopped
Why This Config Wins
| Feature | Why it Matters |
|---|---|
| DOCKER_MODS | Injects intel-opencl-icd at startup. Without this, HDR Tone Mapping crashes because the container lacks the compute runtime. |
| group_add: “109” | Bypasses the namespace isolation bug by forcing the container to respect the host’s specific hardware Group ID. |
| tmpfs mount | Transcoding writes gigabytes of temporary data. Doing this in RAM is faster and saves your SSD from early death. |
Phase 4: The OpenCL “Tone Mapping” Gap
Here is something most tutorials miss. Hardware acceleration is actually two different things:
- VA-API: Used for decoding the video file and encoding it to a smaller size.
- OpenCL: Used for Tone Mapping (converting washed-out HDR colors to normal SDR colors).
If you don’t have the OpenCL runtime installed, your transcoding will work fine for standard 1080p files, but the moment you try to play a 4K HDR movie on your phone, it will crash.
This is why we use the LinuxServer.io image. Their DOCKER_MODS system (seen in the YAML above) automatically downloads the matching Intel OpenCL drivers for the underlying OS version. Trying to manually install these drivers inside the official Jellyfin container is a nightmare of dependency conflicts that I wouldn’t wish on my worst enemy.
Phase 5: Verification (Trust, but Verify)
Don’t just hit play and hope. Let’s look under the hood. While a video is transcoding (force the quality down to 720p 4Mbps in the player to trigger it), run this command on your host:
sudo intel_gpu_top(You might need to install intel-gpu-tools first).
What to look for:
- Video Bar: Should be active (blue/green). This means the decoding/encoding engines are working.
- Render/3D Bar: If Tone Mapping is active, this bar will light up as the OpenCL compute shaders do their color math.
- Blitter: If only this is moving, you might be running in a inefficient copy-mode.
Pro Tip: If you see high CPU usage but
intel_gpu_topis flatlining, check your Jellyfin logs for “VaapiDevice creation failed.” It’s almost always a permission issue with that numeric Group ID we talked about.
Final Thoughts
Getting Intel QuickSync running in Docker isn’t just about adding a device flag. It’s about aligning the Kernel firmware, the User Namespace permissions, and the Driver libraries.
Once you apply the enable_guc fix for your N100 and inject the correct GID, the difference is night and day. We’re talking about smooth 4K scrubbing, instant start times, and a server that stays cool to the touch.
One small step for you right now: Run that ls -l /dev/dri command. If you don’t see renderD128, stop debugging your Docker config and fix your host drivers first.